Feb 24, 2013

4-player Tournament Round-up


So I played a small four player tournament with friends today, using This Khorne-list. Format was basically we rolled one mission for both of the on-going games, and thus we could use VP as a tie-breaker in case of a draw in number of wins.
The missions we rolled were:

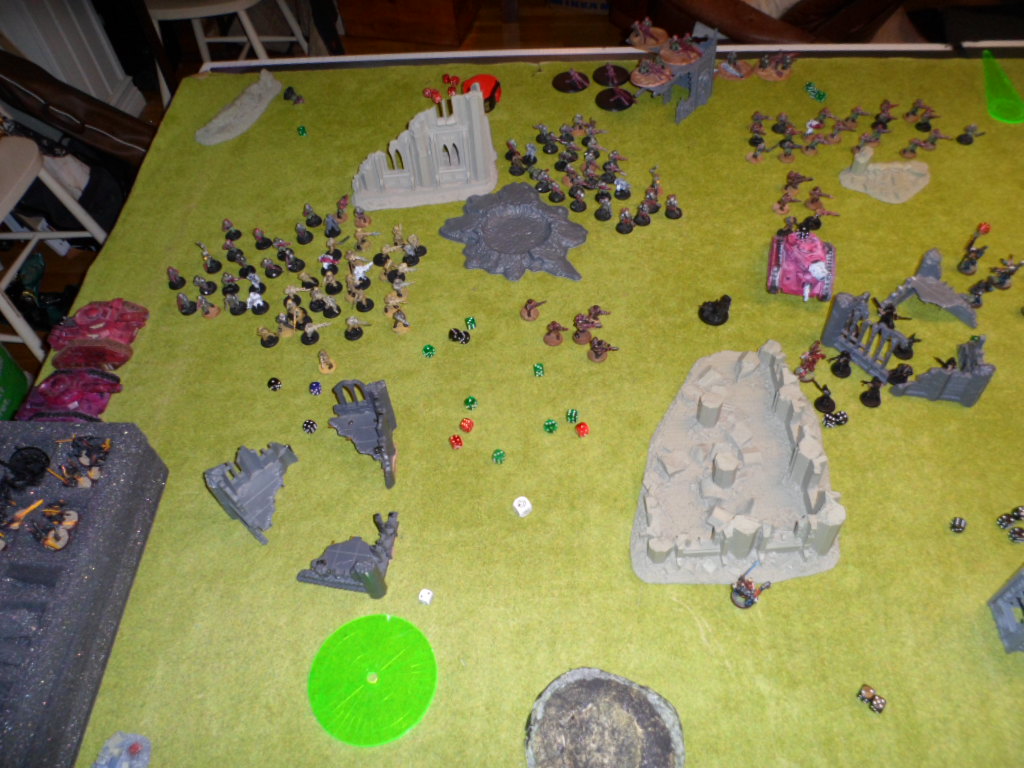
Game 1: Crusade with 3 objectives
Game 2: Purge the Alien
Game 3: The Relic

And the players armies were:

Chaos Space Marines
Iron Hands Space Marine
Imperial Guard
Tyranids


On to a short summary of my games then!


Game 1 - Iron Hands Space Marines

His list was an all around list, notable elements being a Vindicator, three Drop Pods (with melta-squads and a Venerable Dreadnought with Plasma Cannon), Hammer-nators accompanied by the Librarian Warlord, a Storm Talon and two squads of Missile Launcher Devastators.

The pre-game rolls gave my Daemon Prince re-roll to armour saves, and the Librarian got Warpspeed and Enfeeble. His Warlord was also gaining extra VP's for killing characters in challenges. I won the roll off for first turn and there was night fighting.

I started pretty bad, by not getting my Daemons on board turn 1. With this foot slogging list that really is a bad thing because those Daemons were needed to be up there soaking fire from the more important stuff. Everything else moved forward however.

The Iron Hands did get First Blood for exploding the Rhino, and on the left flank my large Marine-blob advanced as fast as they could. The Drop Pods and their contents didn't do particularly much the turn they came in, and the next turn the Daemon Prince absolutely slaughtered the Venerable Dreadnought and the Berzerkers killed the other squad. The Bikers who had sped up ahead also managed to wreck the Vindicator after having to charge it as well. But after that all but one Biker died to fire from all directions. He held his ground however. The Bloodletters also failed to come in turn 2, and when they finally came in turn 3 they scattered on top of a unit and was misplaced in the other corner from where they tried to come in, basically putting them out of the game...

Soon after the blod of Cultists as well as Kharn was killed by combined fire from Missile Launchers, Storm Talon and Bolters - a lone surviving Cultists wielding a Flamer left standing. The Berzerkers were also wiped out, the last one running for an objective, but got a Drop Pod-squad right on top of him pretty much. It looked pretty grim at this point, but then the lone heroic Biker stepped up his game. He charged the 5-man Tactical Squad standing on the Objective behind the building in the Iron Hands deployment zone, killing just enough of them to make them run off the board! In the next turn he charged another five man squad on the other Objective in his deployment zone - staying in combat for a while until he eventually broke them as well! Sadly this time they fled only right to the edge of the board instead of running off. Meanwhile the Khorne Marines killed off the Devastators and claimed the Objective that the Biker had cleared out before. They were hunted by Assault Terminators who had also arrived late however, and was soon caught up by them - they failed their first charge however, and that gave me one more round of shooting that killed at least one Terminator before they could charge in. But then thanks to difficult terrain and a pretty short roll none of the Terminators (except for the Sergeant that was in a challenge) got to strike and the large amount of attacks from Khorne Marines killed off all but one and put a wound on the Warlord - and in the next turn the Sergeant and Champion killed eachother while the Khorne Marines wiped the last Terminator and Warlord. The Daemon Prince had also killed two squads of Tacticals, one on the most far away objective making sure no one would get that one. Suddenly we held one objective each, and the same amount of secondary objectives and the Bloodletters ignored all game were suddenly very close to his objective. But his Storm Talon managed to kill the Daemon Prince before it got to to his charge, and the Bloodletters failed a 9" charge in turn 6 and the game ended. Draw, 5-5! Better than I expected, especially since had it gone to turn 7 I would've won for sure with those untouched Bloodletters charging 7 Marines! Ah well!


MVP for sure!


Game 2 - Tyranids

So, his was a typical monster list with a few unusual elements like two large squads of Gargoyles and a Biowore. Two Tervigons, two Fly-rants, two Trygons and the Doom in a Spore Pod. He rolled Iron Arm for both Fly-tyrants, and the other powers weren't that important. For a gift my Daemon Prince became Stubborn (...). He got a chance to re-deploy units for Warlord traits which he chose not to use anyway. He got turn 1 and there was no night fighting.

He decided for a quite passive turn, and nothing much happened except for his Warlord Hive Tyrant rolling perils for his Iron Arm and his Biowore getting a direct hit on Kharn which he failed to dodge and save (damn Barrage!). Other than that, it was basically only the Hive Tyrants flying closer, spawning 15 gants with one Tervigon and then waiting for me to come closer. I happily obliged of course. But first my Daemons failed to come in turn 1 again. Silly Daemons. My bikers actually managed to cause a wound, and ground one of the Hive Tyrants. But then I failed to charge him with the Berzerkers, and the Bikers by themselves didn't quite manage it and fled the combat.

Turn 2 and his Doom arrived, sucking a wound out of the Daemon Prince and not much else. He moved up Gargoyles and gaunts for the charge - but actually forgot to move one of the gaunt units in the movement phase so they couldn't support the charge - and to make it worse the Gargoyles also failed the charge at the Cultists. His short range fire had decimated the Cultists pretty badly though, so not many were left standing. Then the Warlord Hive Tyrant actually managed to take care of the Khorne Marines all by himself with shooting, assaulting and a sweeping advance. The other squad of Gargoyles also auto-killed the last bikers.

So now my Daemon arrived, and they didn't scatter either so I placed them pretty centrally. The remaining Berzerkers also managed to get a charge on the lower squad of Gargoyles - killing 16 out of 17... and the last one managed to escape. Kill point denial! Kharn and his cultists charged the other squad of Gargoyles, Kharn killing 7 by himself and the cultists killing enough to make the Gargoyles pacified pretty much. But due to being in Synapse they stayed in combat. Oh yeah, the Rhino saved the Cultsists from Overwatch as well, which probably helped a bit for sure, with 17 Gargoyles he should've caused a few wounds at least.

The Daemon Prince was hit by a Hive Tyrant and was grounded, took a wound from the hit as well. The next turn he tried to charge the Trygon but was killed by Overwatch. The Doom sucked some Cultist-sould to reach S9 and headbutted the Rhino in the back - Kharn finished of his Gargoyles and took 3 Cultists as well. Gants and their fleshborers killed off the Bloodletters, and even when I had my Herald in the right position to soak up wounds he failed the first two saves, and when the wounds reached Skulltaker he did the same... The Berzerkers were also shot down due to extraordinary poor saving. Kharn managed to charge and kill one more squad of Gants before he was also shot down wiping me off the board. So Kharn gave me my two only VP's, and it ended 11-2!


Game 3 - Imperial Guard

And then finally the game against the dreaded Imperial Guard. He had a Troop-spam list, I think it was 120 models or so with some fair amount of heavy and special weapons. 6 Autocannons, 3 Lascannons, quite a few flamers as well. Supported by 2 Demolishers with Heavy Flamers and two Leman Russes with Heavy Flamers as well. All in all a horrible army for me to play. We rolled for deployment and got Vanguard Strike. My gift for the Daemon Prince was +1A, and his Warlord caused me to use the lowest Ld instead of highest when close to him. I won the roll off to go first and decided to take first turn. He stole initiative however.

So he popped the Rhino for First Blood and then shot the Leman Russes at the Berzerkers inside - causing 18 wounds - but I actually managed to save the Champion due to really good cover saves. Other than that he didn't actually managed to do much, so I started by turn pretty much intact except for the Berzerkers. The Bloodletters actually arrived this time (!), so I put them in front of half his army to be annoying for them to deal with. The rest moved forward.

Turn 2 wasn't terribly effective for him, but he did start to kill off both the Cultists as well as the Bloodletters (again the Herald failed his saves when trying to soak up wounds). Only Skulltaker and one Bloodletter survived, and they charged a unit of 10 guardsmen which they routed and killed. My Bikers in a spectacular fail only cause a glance with their meltas on one of his Demolishers, so they charged in... and failed to do anything at all. My Khorne Marines failed their charge at one of the squads containing a demo-charge by 1" despite their re-roll and the next turn they ate the large AP2 blast and a lot of First rank, fire! Second rank, fire! decimating them severely.

My Daemon Prince managed to reach one of the Demolishers and exploaded it (but first rolling a 1 on the Daemon Weapon giving himself a wound), and the resulting explosion killed quite a few guardsmen. After that he was shot down by mass amount of fire, meltas with Bring it Down being the nail in the coffin for him. Skulltaker and his Bloodletter were also gunned down. My Khorne Marines finally made their charge at the unit that basically killed them the turn before - but not without losing their Icon to Overwatch (...), leaving only 5 Marines standing. Kharn separated from the Cultists and exploded the other Demolisher by himself. However in his turn 5 he managed to wipe me from the board, Kharn being the last one to go down to his last possible shot (which happened to be a Lascannon). So a brutal 6-0 victory for IG!


Lessons and discussion

So. One draw and two defeats. And the draw was basically played with a 400 point handicap! With this army I'm actually quite pleased with this result. What I'm not pleased with is my horrible dice rolling in the other two games. Game 2 I just couldn't make a save, and game 3 I couldn't make any important rolls at all... The dice really made those games into massacres where they could've been a lot closer. The IG game I really did expect to lose from the start. Large AP3 blasts are a horrible thing to face with a footslogging Power armour army. But had I actually made damage when I should have, and made a single charge at least I'd gone down fighting. Losing initiative also really hurt, the Berzerkers were all ready out of the game and them being one of my fastest units... had the Rhino blown up midfield they might've actually made combat eventually. But alas, it was not to be.

So what I've learnt is that playing against IG you really need long range support or a lot of speed. You simply can't let them give their orders freely, but you have to limit them. Or at least present them with several large threats at once. In this game he really got me piece by piece and never really had to worry. But I knew this was a problem with the list even when I wrote it. But this game demonstrated that it's true in practice as well! Heh. Harsh lesson!

Tyranids. That was interesting. Luckily for him he got the powers he needed and did really well on spawning. The amount of 12" shots he could put out was really enough to cripple me. Here my assault army once again suffered from no long range support. If I had some long range support those Gants were'nt scary at all. Shooting off a unit here and there and the assault troops would've handled themselves just fine - because once in combat they really slaughtered. Not being able to snipe those Tervigons made this an uphill battle as well as he could really flood the middle. Even though the scenario was in my advantage... but then again if I could actually make my saves it'd been a completely different game...

And what's up with those lazy Daemons? They really failed me today, showing up late in 2/3 games and even when they showed up they didn't do much at all. Worst choice in this list for sure! I would've been way better off spending those points in the CSM part of the army instead. With the lists in hand I wish I'd brought the Defiler... and that's a rare thing indeed these days with it being so expensive. But that'd been a lot better than those silly Bloodletters...

But a fun day never the less!

What about the results then? The Tyranids won all three games quite convincingly and took advantage of the homefield the fullest! Iron Hands beat IG in a very close 1VP difference game and thus took second place with one win and one draw. And thus IG got third with their win, and I got last with a draw.

Feb 22, 2013

4player-tournament army

Tomorrow I'll be playing in a small 4 player tournament all day (3 games planned). But since I don't play to win I've made myself a challenge... I'll be playing Khorne! Now last two games I kind of have done so quite successfully - but I made this list before those games. Funniliy this list kind of mixes my two last games. To be honest I don't really believe this list will work that well - especially compared to my last CSM Khorne-list. The big difference to that one was it had quite a few fast components that would be scary and get up in the opponents face early allowing the rest to come close enough to charge. In this list I kind of have that too - but one of those units are Deep striking Bloodletters which I might not even get in first turn.

So anyway, this list is made with only assault in mind. I have 5 bikers with 24" range, but that's the longest range in the army. And as it's not that fast I will probably run in to problems at time by being outrunned or outgunned. I however have no doubt that if any of my units reaches close combat it will kill anything pretty much. Monstrous Creatures will be a close call though, but we'll see.

And that leads me to my opponents; Iron Hands, Imperial Guard and Tyranids. I fully expect to lose vs IG, because the amount of pie plates they can put out combined with fliers... I have nothing to combat that. Especially not if he's going Leafblowers. That will be really hard! The other two will be very dependant on dice I believe, but should be possible to win at least! All though I think I did scare the Iron Hands-player the other day with my assaults so wouldn't be surprised to see two Vindicators showing up on that end either...

Now, with this army there's not much tactical finesse really... chose the targets and assault! The Bikers will have to try and take out the largest nastiest thing they can find before they're blasted off. Other than that I know pretty well what kind of match ups I will be looking for when deploying. But even so it'll be important to stay together to deliver a strong punch and chop the opponent up piecemeal.


And the 1850 point list then:

HQ
Kharn - Warlord
Daemon Prince - Wings, Power Armour, Daemon of Khorne, Gift of Mutation, Axe of Blinding Fury

Troops
28 Cultists - Mark of Khorne, 2 Flamers
17 Chaos Space Marines - Replace Bolters with CCWs + 2CCW for the melta-guys, 2 Meltas, Mark Khorne, Icon of Wrath, Veterans of the Long War, Champ w. Power Fist
10 Berzerkers - 9 Chainaxes, Veterans of the Long War, Champ w. Power Sword & Melta bombs
+Rhino - Dirge Caster

Fast Attack
5 Bikers - 2 Meltas, Melta bombs

Daemons
HQ
Skulltaker
Herald of Khorne - Iron Hide, Blessing of the Blood God

Troops
14 Bloodletters


Some odd choices, I know. The Herald of Khorne is only there to stand in front and make saves for the unit. The Blessing was just added because I had 5 points to spare - but it suits his role as well in case there are some psykers there he'll soak up those wounds as well. And as for Skulltaker... I've only used him once, and then he ended up locked in combat with an Assault Terminator Sergeant all game and did absolutely nothing. This is his chance to redeem himself!

The Rhino might not necessarily contain the Berzerkers... I might hold it back empty and hiding, and then rush it up across the field to get it's Dirge Caster in place before an important charge.

This will also be the first time that I use the CSM Daemon Prince... that will be really interesting to see how it turns out! After playing a Bloodthirster two days ago I know things will die once he makes it into contact... but the Daemon Prince isn't quite as resistant as the Bloodthirster with a worse invulsave, less T and no Eternal Warrior. So I'm really not sure he'll even make it into combat. With some luck my Gift of Mutation will grant him something to keep him alive though! As he doesn't really need more offensive power...


And just because it's fun, let's have a look at the line up as well shall we? Sadly I didn't manage to fully paint it in time though...


BLOOD FOR THE BLOOD GOD!

Feb 21, 2013

1000p: Space Wolves vs Daemons

Time for some fun! Planned a three player free for all tonight, and I've decided to bring Daemons for the first time in a long while. With the new codex just around the corner it's time to say good bye and give a good sending off. Now, I'm very lacking in owning "what is good" for Daemons - so I'm just going for something that should be fun. You can't spell Slaughter without Laughter. So I'm taking this chance to try the Bloodthirster! Accompanying him will be a large blob of Bloodletters led by a Herald as well. The Herald has Iron Skin and is only there to help protecting against small arms fire by standing in the front. This unit in particular I'll keep my eyes on as I'm planning to use it on a mini-tour this weekend... So it'll be good to see just how badly it will hurt. :D

As a second thought I also added in some Unholy Might here and there as a way to perhaps deal better with vehicles. 

The other, and none-preferred wave will be Tzeentch. No, no Flamers or Screamers as I don't own any of those. Instead the Changling because I love how extremely annoying he can be, and also a Daemon Prince with the usual load out of Breath and Bolt. No Master of Sorcery because I figure that if you're going after a flyer you'll want to Vector Strike and Bolt it, and if you go for something on the ground you'll Vector Strike and Breath or Breath and Bolt - so never any need for being able to use all three the same turn and that saves me a lot of points so.

Yeah, that's my 1000 points. I expect to go up against Space Wolves and Dark Eldar. I'm hoping two Monstrous Creatures will be some trouble at this low point level at least - but then there's those Dark Eldar with all their poisoned weapons and what not... I'll probably concentrate on the Space Wolves anyhow - otherwise my shiny, burning AP3 Fellblades would be wasted anyway. With three players anything can happen though...

---

Edit: Sadly our DE player got ill and couldn't make it, so a 1v1 it was!


LISTS

Daemons
HQ
Bloodthirster - Blessing of the Blood God, Death Strike, Unholy Might
Herald of Khorne - Iron Hide, Blessing of the Blood God, Unholy Might

Troops
15 Bloodletters
5 Horrors - Changeling, bolt of Tzeentch

Heavy Support
Daemon Prince - Wings, Tzeentch, Breath of Chaos, Bolt of Tzeentch, Unholy Might


Space Wolves
HQ
Rune Priest - Bike, Psyker: Living Lightning, Jaws of the World Wolf, Runic Armour, Runic Weapon, Bolt Pistol

Troops
8 Grey Hunter Pack - Plasma gun, Mark of Wulfen
+Drop Pod
8 Grey Hunter Pack - Plasma gun, Mark of Wulfen
+Drop Pod
8 Grey Hunter Pack - Plasma gun, Mark of Wulfen
+Drop Pod
Elites
3 Wolf Guard - Terminator armour, Power Fist, Storm Shield

Fast Attack
2 Thunderwolf Cavalry


Pre

We rolled for mission, got Crusade with 4 objectives, and Vanguard strike for deployment. He got extra D6 for runs for Warlord trait I got Outflank on my Bloodthirster. He chose to keep his psychic powers instead of rolling new ones (so Jaws and Living Lightning).  He won both the roll off to chose sides and who to go first - and let me go first.
But since I'm Daemons he was the only one to place any models, and he put the Thunderwolves with the Rune Priest on the board while the Wolf Guard split up and joined a Drop Pod each. He didn't try to steal initiative and no night fighting.

White models spread out are objectives.


+++

"Rune Priest, vox comm from the outpost on the planet below. They claim to have seen xenos on the surface, and some of the local population has been reported missing. The ships they have sighted leads us to believe there are Dark Eldar raiders in the area. What are your orders?"

"I feel some disturbances... it seems to be coming from the bunker below. Perhaps that's what attracts these xenos. We should investigate, who commands this outpost? Get him on the comm."

"Sir... they no longer respond to our hails. All we get is the same repeated message about xenos."

"Very well, I will go down and see for myself. Send word for Harald and Thorleif to join me, we will need to move quickly."

+++


Turn 1 - Daemons

So, I went for the Khorne Daemons for preferred wave and got them. The Bloodthirster hit close to the Thunderwolves to unleash his Death Strike at them, but missed. The Bloodletters also hit spot on and simply spread out on the hill.


Turn 1 - Space Wolves

His two Drop Pods arrived, and one of them scattered quite a bit so he was a bit more spread out than intended at first. The Wolves moved up closer to the units that had come out. First he attempted Jaws of the Word Wolf on the Bloodletters, but Khorne doesn't approve of puny psykers and I made my deny the witch roll with a 6.
After that the two Drop Pods who only could shoot snap shots anyway tried to hit the Bloodthirster but failed. The two units then let loose at the Bloodletters (one plasma got hot, but was saved). Combined they killed only 6 Bloodletters thanks to some good saving throws.
The Thunderwolves also tried to charge the Bloodletters, but rolled a 7 when they needed 8, so failed charge.

The left Pod scattered 11"!


Turn 2 - Daemons

Neither my Daemon Prince nor my Horrors came in.
So instead I moved up both the Bloodletters and the Bloodthirster to charge the Wolves. Oh, the Bloodthirster whipped them first and took one wound off one of the wolves. Then in the assault the Bloodthirster and the Herald combined wiped the unit before anyone else got to strike. First Blood and Slay the Warlord in one sweep! Both got good consolidation rolls and could kind of hide behind one of the Drop Pods for next turn.


Turn 2 - Space Wolves

His remaining Drop Pod failed to come in.
But the two untouched units of Grey Hunters unloaded all they got at the Bloodletters once again. I had placed the Herald in front again, but thanks to Plasma he didn't do as much as he could've. When the smoke cleared only 6 Bloodletters remained.
The Drop Pods failed to do anything this turn as well. Oh, and the objective on top of the bunker was revealed as Sabotaged but it didn't explode.


Turn 3 - Daemons

Both the Daemon Prince and the Horrors arrive. Both hit on target with very little or no scatter. The Daemon Prince on top of the hill to start taking care of the closest unit of Grey Hunters and the Horrors in the bunker between two objectives (both eventually revealed to be Skyfire nexii).
Breath of Chaos killed 3 Grey Hunters (Bolt of Tzeentch missed on a 1) since the Wolf Guard Storm Shield saved a couple of wounds, but then the Bloodthirster charged in, was challenged by the Wolf Guard which he quickly cut down and the remaining five Grey Hunters stayed put.
The other unit was shot at by the Horrors with no wounds, and then charged by the Bloodletters. He made his Counter attack-test, so lots of attacks on both sides. I killed 4 Grey Hunters he caused 6 wounds before Power Fist and I rolled...

Yatzy!

...yeah. The Power Fist killed one more Bloodletter and the Grey Hunters stayed in combat.


Turn 3 - Space Wolves

The last Drop Pod came in and arrived in the middle of the Bunker. With not many available targets most if not all Pods shot at the Daemon Prince with no effect. Then the Grey Hunters that came out of the Pod tried to shoot at the Horrors. But the Changeling glamoured them and they failed their Ld and instead tried to shoot the Drop Pod with the plasma gun (which got hot, but was saved). No damage done.
In the combat with the Bloodthirster the Greater Daemon only killed 3 guys, leaving the Power Fist and Mark of Wulven alive - they caused one wound each in return which failed to save. The Bloodletters killed all but the Wolf Guard and three Daemons died in return, but everything stayed put.


Turn 4 - Daemons

The Daemon Prince flew into the bunker and used Breath of Chaos and Bolt (missed on a 1 again) on the newly arrived Grey Hunters. In a stroke of luck he managed to kill the Wolf Guard and two more guys. The Horrors failed to do any wounds to the same unit of Grey Hunters.
The Bloodletters managed to kill the Wolf Guard and consolidated towards the other free squad of Grey Hunters. The Bloodthirster finally killed the last in his unit and consolidated towards one of the Drop Pods in lack of better things to do.


Turn 4 - Space Wolves

The combined fire of Drop Pods actually managed to kill the last Bloodletters, wiping them out. Then the Grey Hunters tried to fire at the Horrors once again - but again the Changeling managed to glamour them! And again they shot at their own Drop Pod with no effect other than not being able to charge.


Turn 5 - Daemons

The Bloodthirster whipped the Drop Pod with Death Strike - caused a Immobilized (ie two HP lost) and then charged it and wrecked it. Scrap for the Scrap God!
The Daemon Prince killed two more Grey Hunters with Breath (and rolled a 1 for Bolt once again) and then charged them. He took two wounds to Overwatch though! Once in combat he killed the rest of the squad however.
The Horrors sat nearby and laughed as they always do while grabbing the objective to the south of them.


Turn 5 - Space Wolves

The two remaining Drop Pods tried to shoot with no effect. After that we roll for the end of the game, and yes it ends.

5 (First Blood, Slay the Warlord, one objective) - 0. Daemon victory!


Lessons Learnt

Well, once again I was quite lucky with dice. I made some really critical saves that made my Bloodletters live far longer than they should have and that really messed him up. I think that I managed to focus my forces in the beginning thanks to his scattering Drop Pod and thus could chop him up piece by piece, which is how you have to play Daemons I suppose since you only get half the army from the start. Luckily for me his decision to start all units in the Drop Pods helped me with this goal. I think that had he deployed one unit in the beginning and dropping the third Pod empty I'd had some more troubles. More bodies on the ground would've forced me to really consider my priorities - had he done so I don't think I'd been able to charge his HQ-unit and the Rune Priest might've actually had the chance to do anything.
But wow does the Bloodthirster hit like a truck! He killed well over his own cost with ease! I hope the new rules keep him similar to this, or even with some new tricks perhaps.
But heroes of the game was of course the large unit of Bloodletters. They performed well over my expectations. Now, in this game they were of course helped by the fact that there wasn't that much that could really shoot them the turn they arrived (two units of Rapid firing bolters is nothing to scruff at though) which really helped their survivability in the long run. But even so I think it showed that they can actually take a lot of hits and still be rather effective once they reach combat. A unit of 6 wiped out 8 Grey Hunters with their Wolf Guard. Good job! This does help me with how to properly use them this weekend, where I'll have a lot more guns pointing down at me...
Oh, and Changeling. <3 I really hope Mr Kelly didn't change your rules too much!


+++

"The bunker looks abandoned... no wait, is that a figure moving there?" Harald pointed as he spoke.

Suddenly the figure exploded in a cloud of blood and a huge rift appeared in the air with burning figures streaming through.

"Daemons? Where did they come from? Bridge, come in! Send reinforcements by Drop Pod at once! Daemons are coming thro...aah!"

The Rune Priest barely had a chance to finish his sentence as a gigantic Bloodthirster ripped through the veil of reality right before his eyes. It roared, and in the roar a beam of heat shot out and evaporated Harald and his wolf, then it came charging in with a axe larger than three men. Then there was darkness and roaring, mad laughter.

Then there was silence over the snowy hill.

+++ 

Feb 15, 2013

1850p: Iron Hands vs Black (Red) Legion

Time once again for a fight versus the Imperium! This time I decided that I would play either all Khorne or all Tzeentch - so rolled a dice and I got Khorne!

Well, that gives me reason to try out a couple of new concepts. First one I wanted to try was Hordes. Oh yes. Cultists in large squads gets extremely dangerous with the Mark of Khorne. So in went all my Cultists. Then a pretty large squad of Marines, numbering 15, replacing their Bolters with CCW's and sticking two Meltas in there just because as well as giving them the Icon of Wrath. Will probably run Khârn in this unit. Or possibly with the Cultists. I have a hard time deciding... on one hand he makes the Marines Fearless - but I've all ready taken Veterans of the Long War so his Eternal Hatred won't do anything... but he will give the Cultists Hatred... Because of course I have to bring Khârn in this list. Then two squads of Berzerkers just because I have the models and they're starting to look dusty.

The other concept I'd like to try is Single Mutilators as distractions. Mark of Khorne suits them so... good chance I'd say? I don't own the models, and I probably never will - so have to proxy them and we'll see what happens. Two of them went in. I reckon he likes to Combat Squad his units and a group of five should be possible for one Mutilator to handle. Especially with Veterans of the Long War in there. We'll see if I'll deep strike them or not though. And just to keep them company and a chance to try him out, in goes the Helbrute. I really don't expect anything from this model... but anyway. His Crazed rule suits Khorne I think.

I also like that you can basically make Berzerkers on Bikes and Jetpacks. So I take both. I only have five Raptors though, so they'll be a suicide squad I believe, as usual. The Bikers though, I kitted out with the Icon of Wrath and then Champ even got a Gift of Mutation. I think these guys will be up for anything he might field! And to keep them company I put the Maulerfiend in there. Three fast units should keep him busy while my footslogging horde moves up!

Because I won't really care about objectives I think... Khorne wants blood, so the goal is to wipe him out...


LISTS

Black Legion Chaos Space Marines
HQ
Khârn the Betrayer

Troops
28 Cultists - Mark of Khorne, 2 Flamers
15 Chaos Space Marines - Mark of Khorne, Veterans of the Long War, Icon of Wrath, 2 Meltaguns, Replace Bolters with CCW (except for the 2 Meltas who I instead buy the extra CCW for), Aspiring Champion w. Power Fist and Gift of Mutation
10 Berzerkers - Veterans of the Long War, Aspiring Champion w. Power Fist
10 Berzerkers - Veterans of the Long War, Aspiring Champion w. Power Sword and Melta bombs

Elites
1 Mutilator - Mark of Khorne, Veterans of the Long War
Helbrute - Power Fist w. Heavy Flamer, Multi-melta

Fast Attack
5 Chaos Bikers - Mark of Khorne, Veterans of the Long War, 2 Meltaguns, Icon of Wrath, Aspiring Champion w. Gift of Mutation and Melta bombs
5 Raptors - Mark of Khorne, Veterans of the Long War, 2 Flamers, Aspiring Champion w. Power Fist and Gift of Mutation

Heavy Support
Maulerfiend - Magma cutters


Iron Hands Space Marines
HQ
Librarian - Terminator Armour, Storm Shield

Troops
10 Tactical Marines - Missile Launcher, Flamer
+Razorback - TL Lascannon
10 Tactical Marines - Missile Launcher, Flamer
+Razorback - TL Lascannon 
10 Tactical Marines - Melta, Combi-Melta, Missile Launcher
+Drop Pod - Teleport Homer
10 Tactical Marine - Melta, Combi-Melta, Missile Launcher
+Drop Pod

Elites
6 Terminators
Dreadnought - 2 TL Autocannons

Fast Attack
Storm Talon

Heavy Support
Vindicator
5 Devastators - 4 Missile Launchers


PRE

We rolled for Mission and Deployment and got The Scouring with Hammer & Anvil deployment. Just like my last game (and just like that game we used the house rule to not reveal points of objectives until the end)! I get Eternal Hatred for Warlord thanks to Khârn and he got Countercharge in his deployment zone. His Psychic Powers were Warpspeed and Enfeeble. For my Gifts of Mutation I got +1I on the CSM Champion with a Power Fist (woho...!), Raptor Champion +1WS, and Biker Champion Poisoned CC-attacks.
He won the roll off for choosing sides and I won the roll-off to deploy first and decided to do so. He didn't steal initiative and there was Night Fighting turn 1.

Objectives are basically on the left side. I have two Mutilators Deep Striking in, he has Storm Talon, Two Drop Pods and Terminators in reserve. The cat was thankfully not deployed in this game.


Turn 1 - Black Legion

Nothing much to say here. I moved everything (except the Raptors) forwards as fast as possible, keeping in cover were possible... and then rolled some great run-moves of 6-4". Nothing to shoot. On we go!


Turn 1 - Iron Hands

One Drop Pod comes in and lands in the middle of everything and the Marines who comes out starts killing Cultists. The Dreads also manage to kill one CSM. Combined fire from Marines and Devastators kills 3 bikers including the Champion. The Vindicator also shoots at the bikes, but it scatters off and lands on the Maulerfiend but cover save is made. The Bikes then decides they've had enough and flees.

You can really see the cat is planning something here...


Turn 2 - Black Legion

Both of the Mutilators come in, and I drop them in his deployment zone, one to take care of a Razorback, the other for a unit of Marines holding an Objective. Of course they can't do anything else this turn, but...
The Bikes actually rallied and moved into cover, too far away to melta anything this turn.
The CSM on the flank actually managed to kill 3 Marines with their pistols! Then they charged in, and despite needing 10" on three dice through cover they actually made the charge! The remaining two Marines died as well in a flurry of blows. Maulerfiend charged and exploded the Vindicator, which gave me First Blood (Yeah, I'm writing a bit out of order here). In the middle, I charged the Helbrute at the Marines who came from the Drop Pod, eating the Overwatch with that. Then Khârn and his Cultists charged in, as well as one unit of Berzerkers. The other unit of Berzerkers moved into the ruins to claim a objective while getting closer to the enemy lines. All three of these units also shot pistols/multi-melta at the same unit with no special results (except for Khârn getting hot on his Plasma Pistol but not suffering a wound).
In the big combat in the middle I decided to challenge with my Berzerker Champion, and in a stroke of luck he died before he could strike due to his Power Fist. This was excellent news for me, as Khârn killed 5 Marines (and one Cultist) by himself, and the Berzerkers finished of the rest leaving only the Sergeant alive and as every valid target was dead the Helbrute and Cultists didn't even get to fight - but thanks to And They Shall Know No Fear we all stayed locked in combat. Perfect!

Mutilators in the top left quadrant!


Turn 2 - Iron Hands

The Storm Talon failed to come in, but both the other Drop Pod and the Terminators came in. The other Drop Pod also came in the middle to keep me locked in the middle I suppose. The Terminators scattered off target a bit and he had to take two dangerous terrain tests... failing one. And then he died as well. Silly Terminator!
The rest of the Terminators killed off 3 Raptors however, which was enough to make them flee. The Marines with their meltas from the Drop Pod also killed off the two last Bikers for a Victory Point (Fast Attack). The Dreads managed to kill another CSM each and some Rapid Fire Bolters and a flamer killed a couple more. The Devastators shot rockets into the side of the Maulerfiend, causing two unsaved penetrating hits - one ignored by Daemonic Possession and the other a Weapon Destroyed. Then the Razorback finished him off. The other Razorback shot at one of the Mutilators which I dully saved.
In the middle I challenged with Khârn, he had to accept being alone and quickly died (I also hit another Cultist, but rolled a 1 for the to wound!). As a reward Khârn now had Shred.


Turn 3 - Black Legion

Both my Berzerker squads charged full squads of Tactical Marines. One the squad holding the Objective in his Deployment zone and the other the squad that had come out of the Drop Pod. Both results actually went exactly the same, with two Tacticals surviving in both squads (except the Sergeant was killed by my remaining Champion also, but I forgot to roll on Boons! Shame on me!). The ones from the Drop Pod fled and actually got away though, so I consolidated on the Objective in the ruins close by. The other squad also filed Morale, but was caught and thus locked in combat still.
One Mutilator reached the Razorback and exploded it with his Chainfists while the other reached the Marines, killing four of them for no wounds in return.
The Chaos Marines shot their meltas at one of the Dreads causing a stunned result, then they charged in and the Power Fist finished the Dread off. The other Dread was shot by the Helbrute (Weapon Destroyed) and then also finished off in the assault (in return for taking 2 HP back).
The Cultsists shot their pistols (and Khârn missed) at the Terminators, killing 2(!) before charging in. I challenged his Librarian with Khârn and luckily for me he didn't accept with his Terminator Sergeant instead. Khârn only caused a single wound though due to the Storm shield (and killed another Cultist), but luckily for me the huge mass of attacks from Khorne Cultists annihilated the rest of the Terminators before they got to strike (all though I realise we forgot that the Sergeant had a Power Weapon so he might've killed 1-2 Cultists if he had gotten to strike first as he should have). Thanks to And They Shall Know No Fear we stayed in combat once again though since I caught him after he failed morale.


Turn 3 - Iron Hands

The Storm Talon does show up, and it zooms across the board and kills the last two Raptors for an easy victory point (Fast Attack). The remaning Razorback shot the Mutilator that had killed his friend, but once again I saved it. The Devastators took the last HP off the Helbrute. And the Drop Pods actually killed stuff (1 CSM and 1 Berzerker respectively). The two Marines who now auto-rallied shot a melta and pistol at the Berzerkers had had routed them last turn and killed one, charged in and killed another one before dying to the counter-charge. Then the Librarian died in the duel with Khârn, and at this point he had basically nothing left and in particular no Scoring units (or wouldn't have had if we finished the CC-phase) and thus gave up.


Counting the objectives I held as well as the ones I would easily get on consolidates or my next turn even it turned out I had a total of 10 VP (including First Blood, Linebreaker, Slay the Warlord) and he got 2 (for killing my Fast Attack). Khorne victory!


Lessons Learnt

Well, this was basically an exercise in how to roll exactly what you need to roll to make an assault army work! I had some amazing luck with run moves, charge distances, him failing reserves and even failing armour saves just when I needed to. Had that lone Sergeant in the middle not won his challenge this would've turned out a bit differently I think. As it was a large chunk of my army was unavailable for him to shoot at in a turn where he really needed to shoot at me.
But even if we don't count on my luck I'm pleased with how this army actually worked. It has some fast elements that the opponent has to take care off while the rest of the army can advance and get into their own charges. And in this case they did it perfectly, even though it meant they simply died. But they were distracting enough so that my large blobs could actually get across the field.
I really didn't expect the Mutilators to do as well as they did either, but I guess I landed them in a spot where he didn't really have any defence against them - this combined with the advancing CSM on that flank kept them kind of safe and low priority.
It was also nice to get Khârn in there and have him rip stuff up. He really needs to be with at least one other champion so you can focus him on doing what he does best, killing a lot stuff. Running him with the Cultists was a tremendous boost for them as well - his Eternal Hatred and Fearlessness made this large unit seriously scary to face. Despite taking quite a beating I still had more than enough to just drench Terminators in attacks... eventually you'll just fail those 2+ saves.

Feb 8, 2013

1850p: Imperial Guard vs Black Legion

So I was challenged to a game on the other side of the town. As a Champion of Chaos I am rule-bound to accept. At the time of writing this I think I'm playing Tyranids, but I've been informed it could be Black Templars or Imperial Guard also, so I need to be prepared for more stuff. Never having played against Tyranids is exciting though, so lets see what they can bring!

My first thought when it comes to low armour stuff is Noise Marines. But to try something different this time I'll go with two units of Noise Marines, one shooty and one assaulty. Ie Sonic Blasters and Blastmaster for one squad and CCWs and Doom Siren for the other. I gave both units a Rhino with a Dirge Caster. Basically the shooty unit might not even deploy inside of it's Rhino though... it depends on how the battlefield will look like - in that case their Rhino will just be a back up Dirge Caster. Because I want to try those out! All though, Tyranids aren't the ideal opponent to try them against I suppose... but anyway! I also gave the Slaanesh Lord a Burning Brand, he'll run with the Doom Siren squad. Two Templates to shoot from the rushing Rhino... just because I had the points I gave the Rhino a Combi-Flamer as well - because three templates are better than two, right?

Filling out the Troops I also took two minimal squads of Cultists. These will be kept in reserve for as long as possible as I expect them to die as soon as someone is looking at them the wrong way. But if all goes well my opponent will be too busy on his side of the table when these guys arrive from Reserve to grab my homefield objectives.

I also decided that I wanted to try out the Forgefiend, finally... now, if I knew for sure that I'd play Tyranids I'd take the Hades Autocannons for this guy. But since there's a possibility there's Marines on the other side of the board I decided to go for the three Plasma Cannons instead. What'll happen is probably that I'll kill myself in turn 1. But hey!

Now, my Obliterators have been sitting on the shelf for a long time now, so it's about time they get some action done. Could only squeeze two of them in though, but they're always useful against everyone. If they team up with the Forgefiend they should probably wipe out or at least decimate a squad per turn for sure.

Then there's these Autocannon Havocs everyone is so hyped about... as I finally have four of them, why not give them a try? They should be plenty helpful against MC's, flying or not. And if not, well, they should at least put a dent in anything they shoot at.

Another unit that hasn't seen the battlefield in a long time are my Terminators, so in went a squad with mostly Lightning Claws. This unit also got a combi-melta in case of IG. I don't really like combining these purposes like this, but with such diverse possibilities of opposition I feel obliged to do so anyway. They'll be joined by a Slaanesh Sorcerer as well. As when I take Noise Marines I just can't resist the urge to take one of those as well. Symphony of Pain, ah... yes...

I also managed to squeeze in a unit of melta-bikers. Mostly in case of IG, as I don't see them as too useful against Tyranids.

Now, one of the nastiest units in the Tyranid arsenal in my opinion is the Doom of Malantai. So to at least try and combat that a little bit I took Veterans of the Long War on pretty much everything. That'll mean one guy less that dies every time it tries it's soul sucking at least!

And then to finish it all up, I added some upgrades that will probably be useless if I'm playing against Tyranids but will help a lot if I end up playing mechanized IG or Black Templars. Ie, melta bombs, some combi-meltas, power fists and the like.

There wasn't really *that* much thought behind this list, I was asked to demonstrate the new CSM-book and thus tried to take some popular choices but without spamming and it turned out Slaaneshy. I also decided beforehand that the Heldrake would stay home, with it being hard to transport and combined with Tyranids in particular... a flyer would be no fun. I feel like this list is a bit stretched out, and not quite as focused as I'd like and I feel like I'm lacking scoring with the Cultists being a bit of a gamble - but it'll be interesting to see how it turns out anyway!

---

So after arriving to the battlefield I found out I was playing Imperial Guard, not too bad I thought as my Noise Marines have done really well against them in the past... And with the scattered anti-tank stuff I thought it'd be pretty nice in either case.
Also I forgot to take notes and pictures after a while so might've messed up some details.


LISTS

Black Legion Chaos Space Marines
HQ
Chaos Lord - Mark of Slaanesh, Sigil of Corruption, Burning Brand of Skalahhrax, Gift of Mutation, Power Sword, Melta bombs, Veterans of the Long War
Chaor Sorcerer - Mark of Slaanesh, Mastery Level 3, Terminator armour, Spell familiar, Combi-melta, melta bombs, Veterans of the Long War

Troops
10 Cultists
10 Cultists
10 Noise Marines - 8 Sonic Blasters, Blastmaster, Icon of Excess, Veterans of the Long War
+Rhino - Dirge caster
9 Noise Marines - Replace Bolter with CCW, Doom Siren, Melta bombs, Icon of Excess, Veterans of the Long War
+Rhino - Dirge caster, combi-flamer

Elites
5 Terminators - 3 Pairs of Lightning Claws, Heavy Flamer, Power Fist, Champ. w. Combi-melta & Power Axe, Mark of Slaanesh, Veterans of the Long War

Fast Attack
4 Chaos Bikes - Mark of Slaanesh, 2 Melta guns, melta bombs

Heavy Support
Forgefiend - 3 Ecto Plasma Cannons
2 Obliterators - Veterans of the Long War
5 Havobs - 4 Autocannons


Imperial Guard
HQ
Company Command Squad - 3 melta guns
+Chimera

Company Command Squad - 3 plasma guns
+Chimera

Troops
Platoon Command Squad - Missile Launcher
10 Guardsmen - Autocannon
Heavy Weapon squad - 3 Lascannons

10 Veterans - 3 Plasma guns
+Chimera
10 Veterans - 3 Plasma guns
+Chimera
10 Veterans - 3 Melta guns
+Chimera
10 Veterans - 3 Plasma guns

Fast Attack
Vendetta

Heavy Support
Leman Russ - Heavy Bolters
Manticore

Fortification
Aegis Defence Line


Pre

So we set up some terrain and rolled for mission and deployment. We got The Scouring and Hammer & Anvil. Horrible set up for me. Many objectives and a far way to go to reach the IG line? Good thing I took those Rhinos at least after all! We also decided on a House Rule to NOT reveal the point values on the Objectives until after the game - to make it more interesting.
For Warlord traits he got re-rolling reserves, and I got Eternal Hatred. For Gift of Mutation I got +1BS. Not very useful on a guy with a flamer... For Psychic powers I rolled twice on Slaanesh and got Frenzy and Ecstatic Seizure (bah, both that I didn't want, but Frenzy would be nice for the Terminators at least), and once on Telepathy rolling Dominate (not too bad).
We rolled for first turn, which I won - but I decided to gamble and give him the first turn to counter-deploy instead. No Night Fighting. I didn't manage to steal initiative.

I have Terminators+Sorcerer as well as Cultists in reserve, he has a Vendetta. Havocs in the building to the left - and also an objective on the ground there. Another objective in the ruins to the top-right, and the last objective in a building to the left (out of picture).


Turn 1 - Imperial Guard

Not too much movement, shuffling away from my flank a bit and then started the long range shooting. Despite Bring it Down!-orders on the Forgefiend and Lascannons nothing managed to hit or was saved by the invul-save. In the end a single penetrating hit got through, which resulted in Shaken which was dully ignored by Daemonic Possession. The Rhino containing the assaulty Noise Marines also suffered a glance and a Havoc managed to die. All in all not a very bloody first turn.


Turn 1 - Black Legion

Everything except for the Havocs moved forward as fast as possible. The Rhinos popped smoke. The Forgefiend who had miraculously survived turn 1 actually got to shoot! Of course I rolled a Get's Hot! And failed my save (meaning I had made almost as much damage to myself as he did!). The other two Plasma Cannons hit spot on though, clipping one Chimera as well as some Guardsmen. 6 dead Guardsmen made them run (but not off the board) and two Hull Points lost on the Chimera (and forcing Snapshots next round). The Havocs also manage to take a Hull Point off a Chimera while the Obliterators failed to penetrate their target.


Turn 2 - Imperial Guard

The Vendetta arrived, and some minor shuffling for the tanks and on to the shooting again. He started by rolling a double 6 for his first Order though making it so that no further Orders could be issued. One of the Russes managed to strip the last Hull Point off the Forgefiend causing a wreck. First Blood! The Vendetta and the Lascannon team both shot the Obliterators - I only failed one save but thanks to S9 one died. Other than that I kept rolling my saves pretty much, one Hull Point on the other Rhino was taken off though. Ah, and the Manticore and the other Leman Russ pretty much scattered way off targets.


Turn 2 - Black Legion

For Reserves both my squads of Cultists decided to show up, but the Terminators with the Sorcerer decided not to. I'd much rather had it the other way around...
The Cultists ran towards the two closest objectives anyhow, nothing useful for the Mysterious Objectives so far. The Bikers moved up to the damaged Chimera and blew it up, killing a couple of guys inside it from the explosion and the unit was also pinned. My shooty Noise Marines got out of their ride and sat inside of a ruin. The only guy with anything in range was the Blastmaster, so he decided to shoot at the Lascannons and actually caused a wound, and more importantly they failed their pinning test as well! The Obliterator shot his Assault Cannon at a Chimera, but since it was front armour nothing happened. Havocs caused another Hull Point.


Turn 3 - Imperial Guard

No major movement as expected, the Vendetta could still get into position to shoot something (=Obliterator) and the Chimera on the flank containing Plasma Guns tried to move closer but was blocked by the pinned unit from the exploded Chimera.
The Manticore shot at the shooty Noise Marines and got three missiles. Thanks to scatter only one of them hit though, but that was enough to kill some of them at least and pin them. One of the Leman Russes managed to blow up the Rhino with the assaulty Noise Marines, no one died from the explosion but then the second Leman Russ shot them as well and managed a direct hit with the hole centred above my Lord. I failed exactly 3 Look Out Sir! rolls, and thus had to take my 4++ save, but failed one and was Insta-killed. Another 3 or 4 Noise Marines died as well.
Then the Plasma squad from the Chimera shot at the Bikers... got one Gets Hot per guy(!) and two of them actually died! The other Chimera close by also containing Plasma shot at the Bikers as well, doing a lot better (only one Gets Hot which was saved) and managed to kill 2 of the Bikers. The melta-guys were alive though... but they failed their Leadership and fled.
The Vendetta tried it's Lascannons once again at the now lone Obliterator and failed to do anything. But one Havoc died to Autocannons if I recall correctly...


Turn 3 - Black Legion

Rough round for me and things started looking grim. But at least my Terminators showed up. They landed spot on, right next to his Command Chimera. Shot their Combi-meltas and caused two penetrating hits... immobilized and stunned. Bah.
Bikes continued fleeing. Cultists ran towards Objectives. Assaulty Noise Marines moved out of their crater to try an insane charge (10") - they killed one guy with their pistols but then failed the charge.


Turn 4 - Imperial Guard

The Platoon Command move forwards to start the objective hunting, as well as the squad that had lost its Chimera earlier. 
Plasmas, lasers, Lascannons, Heavy Bolters, one Leman Russ all shot at both Noise Marine squads. After the smoke settled three or four assault Noise Marines were the only to survive. The Manticore shot at the Cultists not under a roof, and killed 7 but they somehow didn't flee! Another Havoc also died to plasma from the Chimera coming up on one flank, leaving two standing.
Then there was a lot of Rapid Fire, plasmas and flashlights as well as a Battlecannon shooting at the Terminators. I rolled way below average on my saves and Look Out Sirs, and in the end the Sorcerer and all of the Terminators but one went down.


Turn 4 - Black Legion

The Obliterator shot Assault Cannon at the closest Chimera, blew it up and 7 guys inside died from the explosion. The lone Terminator tried an insane charge against the large infantry squad, just because there wasn't much else to do... he died to overwatching Autocannons though.
The Havocs got a rear armour shot against the Vendetta, but missed. The Noise Marines moved into the ruins for cover and try to get closer to the middle objective.
My surviving Rhino that had moved closer tried to Tank Shock the Platoon Command Squad... but ran into a wall and was immobilized instead.


Turn 5 - Imperial Guard

With so little Chaos forces left on the table units started to get out of their Chimeras to claim objectives. Then he finished off the Obliterator who once again only failed one save but was insta-killed by S9. The Noise Marines also had to suffer some shots, leaving only the banner bearer in the end, I was making some good saves and Feel no Pain-rolls here. The three Cultists and the last Havocs were also killed.


Turn 5 - Black Legion

At this point I had 10 Cultists and one Noise Marine left on the board. The Noise Marine tried to charge the Veterans on top of the middle objective, thinking that at least he might drag them off the objective with the pile in moves and since I controlled one objective it might be enough for a draw at least with some luck. But no, he died to Overwatch anyway.
With only 10 Cultists on the board I didn't feel like any need to roll to continue... So instead we revealed the objectives, and to add salt to injuries the one objective I controlled was the one worth 1VP... which made the final result 14 (First Blood, Slay the Warlord, 1 Fast Attack killed and four objectives) against 1.


Lessons Learnt

So. That was brutal. In turn 3 everything fell to pieces pretty much. Unfortunately for me that was one turn too early - had I survived for one more turn I'd been in charge range - meaning the Hammer & Anvil deployment is probably what screwed me over most this time. With my list being pretty mid-range it's hard to stand a chance against those large pieplates - and this was still a relatively nice IG-list!
This game also clearly showed why you want Mark of Nurgle on Obliterators... I didn't take it for fluff-reasons. Bad move. With this deployment map you really need that T5 if you're going to foot-slog them. So since I didn't make them Nurgle I should've deployed them with Deep Strike instead. I felt like they spent most of the game too far away to get any good targets. In the end they paid for themselves by eating a lot of Lascannon fire and killing a Chimera at least though - but they're capable of a lot more!
And talking about Deep Strike. The Terminators really arrived one turn too late - that turned out to be a big blow for me. And then my positioning was really stupid. I have absolutely no idea why I put the Sorcerer in the front. Meaning he pretty much died without doing anything. I would've been better off with an extra Terminator with a combi-melta instead. As I wrote in the intro all ready I didn't like the look of this load out... and I guess this game shows why it's a bad idea to mix like this. They didn't have enough shooting to hurt, and they didn't have the numbers to reach close combat.
I see some potential in the Forgefiend though. He seems to scare people and rightly so, only one round of shooting and he took care of most of a squad and a transport by himself. I'll definitely bring him again sometime - but in a better environment. In this list he was too alone in terms of armour. Perhaps he'd fit in a list with two Predators?
All in all a hard mission for me to pull off with this mid-range to short-range list. Perhaps it was unwise to give away first turn with this deployment map as well - like I wrote one more turn to get closer might've been all I needed to make a big difference. But then again, had he got the chance to counter-deploy against me he'd put the juicy targets as far away from me as possible anyway. This way he had to spread out a bit, giving me a chance to drive a spearhead into one point at least.
Alas! Re-match at some point is called anyhow, hopefully we'll get a game that ends closer then!

Feb 5, 2013

Walkers of Death: 1750p Iron Hands vs Black Legion

So, an idea hit me a while back. My friend who plays Iron Hands obviously likes Dreadnoughts. I can also field a lot of Walkers, and add Monstrous Creatures to make up the numbers. Clash of Titans? Yes, had to be done. My list is basically all the big guys I could squeeze in. Bare minimum of Troops... hopefully we'll not play objectives...


LISTS

Black Legion Chaos Space Marines
HQ
Daemon Prince - Slaanesh, Mastery Level 2, Gift of Mutation, Black Mace, Wings, Power Armour, Spell Familiar

Troops
5 Chaos Space Marines - Meltagun

Elites
Decimator - Siege Claw & Heavy Flamer, Butcher Cannon
Helbrute - Power Fist, Multi-melta

Heavy Support
Maulerfiend - Lasher Tendrils
Defiler - TL-Heavy Flamer, Reaper Autocannon

Daemon allies
HQ
Keeper of Secrets - Daemonic Gaze, Pavane of Slaanesh, Soporific Musk, Transfixing Gaze

Troops
5 Daemonettes

Heavy Support
Daemon Prince - Wings, Tzeentch, Iron Hide, Breath of Chaos, Bolt of Tzeentch


Iron Hands Space Marines
HQ
Master of the Forge - Conversion Beamer

Troops
10 Tactical Marines - Missile Launcher, Melta gun, Combi-melta
+Drop Pod
10 Tactical Marines - Missile Launcher, Melta gun
5 Scouts - Snipers

Elites
Venerable Dreadnought - Assault Cannon
Ironclad Dreadnought - Seismic Hammer+Melta gun, DCCW+Storm Bolter
+Drop Pod
Ironclad Dreadnought - Seismic Hammer+Melta gun, DCCW+Storm Bolter
+Drop Pod

Heavy Support
Dreadnought - 2 TL-Autocannons

Dark Angels allies
HQ
Librarian - Melta bombs

Troops
5 Tactical Marines - Plasma Cannon, Veteran Sergeant, Melta bombs


Pre

So, first of all my opponent messed up in his list building somehow and brought some 170 points too little, but luckily for him I have some Dark Angels available and got the codex yesterday so allies it is...
We rolled for mission, and got The Relic as well as Dawn of War Deployment. I got Eternal Hatred for Warlord trait, he got Feel no Pain when within 3" of objective (hahaha, big chance of that ever happening to the Master of the Forge...). For Powers I got Symphony of Pain as well as Iron Arm, he took Prescience. My Gift of Chaos turned out to be an Unworthy Offering.
He won roll off for both table halves as well as to go first, but decided to let me deploy first. Night fighting for turn 1 was enabled. Then he stole the initiative. Bastard.


Turn 1 - Iron Hands

First turn two Drop Pods arrive, one Ironclad and a Combat squaded unit of Tacticals with Melta and Combi-Melta. Drop Pods always lands where you want them, so he landed in front of my walker-line as well as in front of the Defiler. Blew up the Maulerfiend. Blew up the Defiler. Ouch.
The other half of the Combat squad was hanging out close to the Relic. The Librarian cast Prescience on his unit and the Plasma Cannon shot at the Chaos Marines that had been hiding behind the Maulerfiend and wounded all five, but thanks to Nightfighting only two died (one thanks to Preferred Enemy).
One Dread also scored a penetrating hit on the Helbrute but it was only Shaken, while the Master of the Forge hit the Decimator but failed to do anything.


Turn 1 - Black Legion

My preferred wave of Keeper of Secrets and Daemon Prince came in. Both on the left side towards the middle, to try and clean out the Troops in the middle.
The Keeper used Pavane on one of the Marine units to line them up for the Daemon Prince to Breath of Chaos at them, killing only two though. The Keeper killed one with his Demonic Gaze at least.
The Crazed Helbrute got Rage+Fleet for being hit last turn, and I decided to use him to blow up the Drop Pod. Shot his Melta and then finished it off in the Assault. The Decimator used his Heavy Flamer and Butcher cannon to kill two Marines, and the Chaos Marines killed another one which made them flee. The Decimator then caught up to them in the Assault and killed them however.
My Warlord Daemon Prince used Iron Arm to get +2S/T and used Symphony of Pain on the other five Marines from the Drop Pod just because he could. Then charged them, and thanks to Hatred (I rolled abysmally to hit) killed them all.
The other squad of Marines fired their Melta at the Ironclad but failed to penetrate.


Turn 2 - Iron Hands

The other Drop Pod with the other Ironclad came in on my right side. The combined fire from Dreads and Tacticals brought down my Warlord as I literary couldn't make a single 3+ save despite not many shots actually wounding thanks to T7.
The Librarian guided the Plasma Cannon once again and shot the Chaos Marines again, killing another two (Preferred Enemy responsible for another one). But the Melta gun survived and stood his ground.
The newly arrived Ironclad shot the Helbrute in the back and caused another Shaken result. The other Ironclad shot his Melta and Storm Bolter at the Chaos Marines - killing two. They then failed their Leadership test and fled off the board. Cowards.
My flying Daemon Prince got to eat a lot of Rapid Fire Bolters and Snapfiring Rockets and took two wounds but stayed in the air. The Keeper also took one wound from Botlers.


Turn 2 - Black Legion

The Daemonettes came on. But the whole table was rather clustered so I couldn't find any good spot to land them in cover and still being close enough to the Relic to manage to somehow grab it in the very end. So instead I put them to one side, hoping they'd be forgotten and getting good run rolls.
The surviving Melta gunner teamed up with the Helbrute (that got Rage for being crazed and shook off the Shaken result this turn as well) and both fired their meltas both in the two-dice range at the Ironclad... and only caused a single glance. The Helbrute then charged in and managed to cause one penetrating hit, but only Shook it. Then died to the return-swing.
My flying Daemon Prince vector striked one Assault-dread and actually caused a glance, and then used Breath and Bolt on the Dark Angels... killing only one. I had set his course towards the Master of the Forge though, so next turn I might get at least one VP...
The Keeper of Secrets made the Venerable Dread dance closer to himself and then charged him, causing one HP lost on it and took no wounds in return.
The Decimator got close enough to some approaching Marines to use it's Heavy Flamer again, and with a stroke of luck hit and wounded with all four Butcher Cannon shots as well causing in total 8 wounds and all five Marines somehow died before I could charge them!

Yes, those are Daemonettes to far the left...


Turn 3 - Iron Hands

The Librarian guided the Plasma Cannon once again (not that it ever needed it) and he was determined to kill that one last Marine, and did so. Sadly I failed my cover save.
Running out of targets on the rest of the board, a lot of units shot at the Flying Daemon Prince and didn't do much - but the last Dread shooting actually hit and caused him to be Grounded - the impact took one wound off him.
One of the Dreads took a Hull Point of the Decimator.
The Keeper caused another Hull Point off the Venerable with nothing in return, and then used Hit&Run to get away towards the closest Troop-choice for my turn.
The rest of the army consolidated towards the Relic in the middle.


Turn 3 - Black Legion

The Daemonettes rolled a 1 for their run move...
My Daemon Prince vector striked at the Dread in front of the Master of the Forge and failed to do anything despite four hits. But instead he got Bolt off and Insta-killed the Master of the Forge. Woo, I'm on the score board!
The Decimator continued his Kill-streak and flamed, shot and charged the five Marines behind the last squad he killed and killed all five there as well, before consolidating back towards the middle.
The Keeper used Dance and Pavane on the closest squad of Marines, glared one to death as they danced closer so he could charge them - where he decapitated all of them before they could blink. He then consolidated behind the hill.
The Decimator got his Hull Point back from It Will Not Die.


Turn 4 - Iron Hands

The Dread at the far back who had failed to protect the Master of the Forge decided that at least it could avenge him and actually managed to kill the flying Daemon Prince...
Another Rifle-Dread shot at the Decimator... in the front armour... and rolled three bloody sixes! At least the Daemon save saved one of them and the resulting penetrating hits only Immobilised it. One of the Ironclads who had shot his melta (but missed) also tried to charge but failed. The other Ironclad also moved closer.
The two man Marine-squad moved up and ran next to the Relic while the Dark Angels started moving through the forest.


Turn 4 - Black Legion

The Daemonettes moved up into his Deployment Zone to secure Linebreaker at least as they were way too far away from the Relic.
The Keeper used Pavane on the two Marines next to the Relic and dragged them closer. Tried to charge, but 12" was slightly too long...
The Decimator shot the Venerable in the back and killed it. Fast turns with seven models on the board...


Turn 5 - Iron Hands

The Ironclads moved up super-close to the Decimator determined to not fail this time.

Uhm... Hi guys?


The two Marines grabbed the Relic and the Dark Angels moved up in support of them as well.

The Ironclads hit with their meltas... but the Decimator survived! So both Ironclads charged in... one of them barely made it! The Decimator then caused two penetrating hits, one for each Ironclad. I started rolling the results, first the one with only 1HP left - explodes! Then the other one... Weapon Destroyed. Aaaah, had I got those results in the other order and also survived the close combat the Decimator could've shot the Marines grabbing the Relic next turn! But alas it was not to be, and it didn't survive anyway.

The Keeper was also gunned down by a Rifle-Dread.

Daemonettes still on the left side... but they're so good at hiding that they're even outside of the picture!


Turn 5 - Black Legion

5 Daemonettes on the table, but as the Decimator didn't explode it had a slim chance of standing back up again and perhaps killing the Marines holding the Relic and thus forcing a draw... I rolled the dice, needing a 6... and five pips showed up. Ohwell!

We rolled to see if the game ended, and it didn't - but I decided that since he would be able to run away with the Relic at this time and possibly even getting Linebreaker of his own I conceded. Good game!

5-2 Iron Hands.


Lessons Learnt

Well, it was obviously a pretty wacky game with such lists but I still learnt a thing or two. I made a huge mistake with my Warlord. Really wanting to try the Black Mace I got tunnelvision meaning I only thought about killing infantry with him. Instead I should've used him in turn one to charge the Ironclad when the melta failed. With Iron Arm I was safe from retaliation even should I fail to Smash him to death. Instead I put him in the middle of the board where his whole army could shoot him... okay, I made some horrible saves, but still. And considering how detrimental that Ironclad was in the end...
And then there's those damn Drop Pods. My opponent is usually pretty damn unlucky with those, and fails to do much once he comes out. But in this game they did exactly what they were supposed to, and due to my lack of Troops I couldn't bubblewrap stuff either. And it hurts. It basically meant that I got a 400 point handicap from that point onwards. So, if building a serious list - always, ALWAYS consider Drop Pod defence. So dangerous.
I'm also glad to see that my Decimator actually did stuff in this game. He killed 14 Marines and two Dreads by himself. That's a good showing I think! Without him this would've been a massacre after that start.
I was obviously at a huge disadvantage from the beginning with my lack of Troops, and then my best Marine-killer (Defiler) died in turn 1... So I had to play from behind all game, and try to play for a draw. In the end it was really close, a lot closer than I thought it'd be actually. Those big guys can really dish it out if they get the chance!
One Ironclad surviving two meltas and three Power Fist attacks in one turn... MVP for his side for sure!
Oh, and it was also the first outing of my Dark Angels. Okay, not a big one by any means... but they did their job really well. It's pretty sick that they can take a Plasma Cannon in a five man squad! And Preferred Enemy really hurts... In the end they were kind of the back-up plan for him that could secure the win, so I'd say they made a really sable addition to his army this time, despite only being 6 of them!