Mar 28, 2014

Magnetised Herald/Sorcerer/Blue Scribes on Disc of Tzeentch

So I bought a Chariot of Tzeentch, because I wanted the disc. It's kind of the obvious use of it, right? However, I'm not planning on making a Screamer-star, but I do want a single Herald on a Disc to add some variety to my lists. But I also wanted it to benefit my Chaos Marines, so I decided to make the Disc magnetised! I had a Sorcerer who got the honours, and the way I made it I can create more discs at a later time... since I would like to make a Chaos Lord as well (running the Murder Sword, I like the idea of an assassin on a jetbike!).

Here's the result anyhow!


I also put a magnet on a simple base, so that I can use these models on foot instead should I want to. I'll probably make something more fancy out of it later, but for now it's simply a magnet in a base...


*Edit*
So I looked at the bits that were left... Blue Horrors, books, scrolls... Wait, two Blue Horrors on a Disc? Now that seems familiar. So I went ahead and made my own version of the Blue Scribes as well.


Mar 22, 2014

My list for a small tournament

So a couple of friends (and friends of friends) are going to have a little tournament in a couple of weeks. Seems to plan is to cram in 4 game tables into my flat, which will surely be interesting. So far we're 7 players, aiming for 8. We're going for a 1500p and will be using active komp (2) (this is the guideline for anyone interested: http://sdrv.ms/1eWMbIv ) and no allies. Wasn't my idea, but I'll look at it as a challenge. We'll also be using BAO missions.

Armies so far seems to be Daemons (me), Imperial Guard, Necrons, Iron Hands, Tau, Sisters of Battle(!), Dark Eldar and another Necron army. Nice variety there!
And here's my army: 


1 Be'lakor
1 Herald of Khorne, Juggernaut, Exalted Locus of Wrath, Exalted Reward
1 Herald of Slaanesh, Mastery Level 2, Exalted Locus of Beguilement, Exalted Reward

20 Daemonettes, Alluress, Greater Reward
10 Horrors, Iridescent Horror 

20 Flesh Hounds
3 Screamers
10 Seekers, Heartseeker, Greater Reward

Total: 1500p

Komp: 2


So, this komp system puts some limitations on what kind of lists we're allowed to take. Flying Circus is way out of the question. But for some reason you're given komp for multiple units of Flesh Hounds and Seekers... but one big unit is fine. So looking at my options I decided to go for that, since I have the models available as well.
So one large squad of Flesh Hounds, which will be led by the Herald of Khorne who will most likely carry the Grimoire. No surprises there. I was pondering about dropping the Grimoire, and only taking a Portalglyph... but the komp specifies that if you have one Herald with a Exalted Reward that's 1 komp... taking another Exalted Reward doesn't give any extra komp, so I figures I might as well take both anyway.
What to put the Portalglyph on though? I quite like the idea of the large squad of Daemonettes that has been around the blogosphere lately. So I decided to give it a try. And then the Herald to lead them makes sense, since I can't multiply this squad unfortunately. I think this squad will be able to support the Hounds nicely in a second wave as they're almost as fast. The Master Level on the Herald is basically just for points, I couldn't think of anything more useful - and I do think the Lore of Slaanesh might come in handy here. With two rolls I hope I'll be able to get Acquiescence, but I'll be quite pleased with Cacophonic Choir as well. I could go for Telepathy here, but the thing is with such a low Ld model I look at this as just a bonus... I don't want to think of this as "I need this power for it to work" and rely on Ld8. Besides, I have Be'lakor all ready to deal with that.
Be'lakor. My toolbox who'll give me some flexibility. I know I'll have to be really careful with his placement... with Tau and IG on the table, both pretty gunline heavy there'll be plenty of small arms fire that will really hurt him if caught out of position. I'll really have to judge for each turn if Be'lakor or the Hounds needs the Grimoire more. Meanwhile he'll run around doing his thing wherever he's needed. I think he's the glue that holds this list together.
Seekers will probably outflank I think, knowing that there'll be Manticores and static Tau I think they might be just what I need to break them up a bit. Force their deployment a bit. Thing is, whenever I've deployed Seekers they've been blasted off the board before they could do anything. So I think Outflank is the way to go with them.
The Screamers will also be in Reserve, with only 3 of them I don't want to start on the board unless I have a nice piece of terrain in my deployment zone to hide behind. This unit is only there to be annoying. It can fly around, slash some vulnerable troops, pick off some artillery or such, and if I keep them alive they can contest pretty much anywhere on the board in the last turn. I really like this distraction unit... because even if my opponents shoots at them and kills them, at least they drew away some fire from my bigger threats - and the Hounds in particular will be happy if less stuff are shooting them. 
Anyone has any comments/suggestions for this list? Something you'd do differently (and remember to consider the komp)?


Mar 18, 2014

Exalted Flamer of Tzeentch

Okay, so what do we have here? GW realised they had a model you could put on the table that had no rules. So they went ahead and "created" rules for it. So there's absolutely nothing new with these rules, except for the fact that the Exalted Flamer now can deploy without his Chariot - this costs half the points it normally does. Unfortunately they didn't add Relentless this time around either, and unlike normal Flamers of Tzeentch this guy is not Jump Infantry. So instead of being stuck on a Fast Skimmer vehicle that can't move if you want to shoot - you're now stuck on foot and can't move if you want to shoot. Splendid.

So anyway, can we make this work somehow? It takes a Herald-spot, so I'm going to assume it's possible to take 4 for one HQ slot. This may, or may not be possible - I don't really know. And what do we get for this? We get a Heavy Flamer with Torrent and a S9 AP2 gun. Well, you can't move if you want to fire the Flamer... and if you want to hit anything with the high strength gun you also need to stand still. So the only use I can find for this guy is adding some defence for a squad of Horrors. D3 Heavy Flamer hits when someone charges them is quite nice. Especially if you have 3 of them around. Add a Herald as well who can put Prescience on the squad. Unfortunately the Exalted Locus doesn't affect the strength of the Exalted Flamers since they're shooting guns and not casting Psychic powers (S6 Torrent Flamer would've been nice!). So a max squad of Horrors, 3 Exalted Flamers and one Herald. This unit will actually be quite hard to shift from an Objective, especially if they sit in some nice area terrain/ruins to protect them from Shooting. Thanks to Torrent Flamers and Flickering Fire it'll be death for any Infantry to get close. Also, if they do stand still they have D3 S9 AP2 shots with 18" range from each Flamer. That's some solid anti-armour right there.

So that's something I guess. Now the question is why anyone would actually charge into this unit? Or put his armour close enough for the Blue Fire to be in range? Oh well...

My other idea would be to use them as a deployable turret... Take 1-4 (remember, Heralds can form squads of their own) and Deep Strike them somewhere you feel you need their help. First turn when they arrive they'll only be able to shoot the Blue Fire as snap shots, but next turn they'll probably be able to defend whatever location you chose for them decently well. Make sure to have Icons around, and some Prescience close by and they might actually do something. 

Anyone else found any use for these guys?

Mar 15, 2014

Crimson Slaughter

First off, I won't be reciting any rules, because they're exactly like what we saw leak a week ago. So use your Google-fu, young padawan. With that said, those rules aren't very interesting. There are some neat items that you can use in some new combinations that's fairly powerful, but nothing super strong. The one rule that's interesting is that as it stands right now Codex: Crimson Slaughter can only ally with Chaos Space Marines. No other. Don't know if that's a typo or not, but that's what it says.

TL;DR of this quick look of the book: If you're in it for awesome rules - don't buy this.

What that out of the way, before mentioned items could make some fun games and I'll definitely try them out - for variety if nothing else. I've run Khorne-only CSM before, and it surely is a challenge. These rules doesn't change that, it's more of a side step from the normal CSM really.

But that doesn't really concern me much in this instance. I didn't expect this book to have any awesome rules, I bought it for the art and background. I haven't read the background yet, but it contains the same amount of background as the Black Legion book - so that certainly seems promising. What I really love however is the art! It has some awesome pictures in there. All goes in Crimson of course. It got me really inspired to paint some red stuff! Here, I'll give you a soundtrack for reading this book:


And then there's the scenarios. As usual there's 3 Altars of War missions and 5 Echoes of War. Some of these scenarios are actually really cool and I will definitely use ideas from them to make them more general and not be Crimson Slaughter specific.

So I got this one with very low expectations and got a nice surprise that'll add some variety to my games, and quite a lot of background to read so I'll be entertained for a while. I'm quite pleased with this turn out actually.

Feb 18, 2014

Kill Team and mini tournament

And some more pictures I found in my camera... Some Kill Team! One evening we played some Kill Team, I brought out an elite warband of Chosen and faced off against Salamanders and Blood Angels with the new Kill Team Rules. I really like those scenarios!

I think the pictures got a bit messed up in order when uploading... These are two games against the plasma heavy Salamanders anyhow.

Game 1:


It was a really brutal game where shooting was king. I had a really hard time to stand up to those Plasma guns, so the Salamanders were victorious.

Game 2 against the Salamanders:


Game 2 I was a lot more cautious, trying to use the terrain a lot more, knowing how much it hurt to have models removed each turn. That combined with some luck (twin-linked plasma guns failing to hit/wound) saw me victorious in game 2!

Game 3 against Blood Angels.


This was a pretty cool scenario where I had to try to get off the board with my troops while the Blood Angels got victory points for killing enough of my units. Basically, had I got a single model off the board I would've won. And I would've managed that if I had rolled 4 or more on a run move after surviving a ridiculous amount of shots for one turn... I rolled a 3 and as you can see above was caught in assault with my lone survivor. Alas!


On a completely different note I recently bought a table big enough to play on. This I celebrated by inviting some friends to play a mini-tournament of four players. A couple of pictures from those games:


First roll of the game.

After this I forgot pictures... but my semi-flying circus wrecked the Blood Angels pretty bad. It was all topped off with Terrifying his large unit of Death Company, assaulting them and killing Dante in a challenge with a Daemon Prince... and well, good luck running away from I9. Heh.

On the other board we saw Iron Hands (with two Land Raiders!) face off against Eldar.

That Land Raider is black. Promise.
And in my second game, the winner's game I faced off against Eldar. Pretty shooty list with lots of Warwalkers, Guardians and Weapon Platforms, all made Fearless by the Avatar.


I had some bad rolls at crucial moments, was grounded in every turn (but managed to survive pretty well), Screamers failing to kill warwalkers (getting killed in the process...) etc. And my reserves were delayed to turn 4... I really should learn not to put stuff in reserve against Eldar. You really need those stuff on the board when you're up against the space elves. I was pretty much killed piece by piece and didn't have much say in this game.

But nice to have the board where you don't have to become a hunchback to play! Yay!

Feb 14, 2014

2 games of Flying Circus vs Eldar

So over at The Warmaster-forums user bladesteel, a fellow swede among all Americans found me and challenged me to a game or two. Turned out to be two. He brought Eldar and I tried out a Flying Circus for the first time, as well as Be'lakor.

Again, these are old games and I can't remember the powers rolled or gifts etc... so take it as you will!

The lists were something like this:

Daemons:
Be'lakor
Keeper of Secrets (With Portalglyph)
2 units of Daemonettes
10 Seekers
3 Slaanesh Princes (the Gray one has Grimoire, the other two lashes)

Eldar:
Mantarch (Autarch on Jetbike with Mantle of Laughing God)
Autarch on Jetbike (Warlord)
Wraithguard w D-scythes in Wave Serpent
Wraithblades in Wave Serpent
2 units of Dire Avengers
4 units of Jetbikes
8 Warp Spiders
Wraithknight
Wraithlord w Brightlance


Game 1

Hammer and Anvil, The Relic.

I deployed very defensively (you can't even see all of my army on the pictures...), hiding far back and Troops in Reserve as well as Outflanking Seekers.
He deployed pretty aggressive, keeping his Jetbikes in reserve.


For some reason I split my army up here, Be'lakor and one Prince (who had Eternal Warrior due to Iron Arm) goes on one flank and the other two goes up the other flank. Huge mistake. Don't split up a Flying Circus.
Be'lakor Puppet Master the Wraithknight and unleashes the Wraithcannons on the visible Wave Serpent. He made his Cover save from Night Fighting on both pens. Ah well.


Needless to say, my Prince who flew way too close to his line died turn 1...


One unit of Daemonettes drop in, and the Seekers arrive. For some reason I decide to try and use them to chase after the two Autarchs. Silly move, they should've gone straight for the Wraithknight. Be'lakor moves up like a boss, Vector Striking some Dire Avengers and also gets the Grimoire treatment for that nice 2++. Puppet Master again, but I fail to wound the Serpents again.


I kind of lost track of pictures here, this is turn 3 I think. What happened in between was the Autarchs charged the Seekers... and wiped them out in one go because of a horrible Instability roll... The Wraithknight instakilled the Keeper (damn those Distortion shots!). I managed to swarm the Relic at least, and eventually Be'lakor charged the Wraithknight and easily killed him. But that was basically my only victory, as my other Princes quickly went down to Wave Serpent Shields grounding them, and then those nasty 6's on D-scythes. With my Princes gone he went on to charge his Mantarch into my Daemonettes, wiping them in one go as well, and Spiders shooting off my other Troops.

So in essence I lost this game with that early mistake pretty much. After that I played catch up, but just couldn't do it. Even with his Jetbikes out for most of the game he completely out shot me. Of course I had to have a re-match!

Game 2

We switched up the terrain a bit and went at it again. Again Hammer&Anvil deployment, but Emperor's Will this time.


I won first turn again and deployed defensively again. Daemonettes Deep Striking and Seekers outflanking. Turn one I moved up behind the large hill (which is a Line of sight blocker). I put Grimoire on Be'lakor and felt invincible, so I put him on top of the mountain. Perhaps not the smartest move, but pretty baller at least.
He tried to bait me with his Warp Spider by putting them up front to draw me in. It totally worked, except for one thing... I rolled awesome on my lash-shots and killed all but one. Trap disarmed.


Wraithguard and Wraithblades came out to play, and his entire army shot at Be'lakor. He brought him down to a single wound left, but he took it like a boss. Bold move passed.

My turn 2 came up, and I rolled a 3 on the Warp Storm table... randomised the target (I had six Characters on the table so wasn't worried at all!). And of course it hits Be'lakor. What! I rolled my three dice, knowing I only had to roll 11 to lose my Warlord and First Blood... and rolled:


Aw yeah. No Chaos Gods will mess with Be'lakor!


Massive fly-by of Vector-striking Daemon Princes pretty much wiped out the Wraith-units. The last one was charged and quickly killed in assault.
Seekers also came in, and this time there was nothing to distract me from the Wraithknight as he had even deployed close to a board edge. I tried to surround him to be able to auto-charge next turn.


Be'lakor finally went down in the Eldar turn, but he had done his job really well all ready so that was okay. He tried to escape with the Wraithknight and wither down the Seekers. Didn't help much.


Seekers finished off the Wraithknight, Daemon Princes went after his Troops and the Wraithlord. Not much left of his Troops at this point...


And this was the end. Those Wraithblades are actually Daemons who spawned from the Portalglyph (couldn't be bothered to go fetch more Troops). So basically 4 Dire Avengers survived, one Daemon Prince would come back the turn after. We called it there.

So, game one was a total domination for the Eldar and second was total domination for Daemons! That's how it goes sometimes I guess!

What I learned was how damn awesome Be'lakor is. He's a real boss, not that I ever doubted. Pretty expensive, but so worth every single point. Flying Circus was also quite interesting to play, as it's really fragile sometimes but oh so powerful when it's go-time. Good games!

Feb 13, 2014

Taking the Eldar for a ride on a Daemon World against the Iron Hands

We decided to have another go at the Daemon World rules and scenario from Crusade of Fire! Again, this is a very old game so won't be a real report... but mostly pictures!

I took Eldar since I had just built my Wraithknight into a state where it was playable (during the night actually). So basically a Wraith-army is the majority of my force. I face off against a Dread-heavy list of Iron Hands.


Deployment, I deployed second and went for a refused flank. My Rangers were wiped for First Blood, and also my Guardians gained 4 Possession counters of Tzeentch (granting them a 3++!).


So the first thing that happened in my turn was a unit of my choice got to Deep Strike anywhere... well, of course I moved his Devastators with the Master of Forge right in front of my D-scythes. Thank you for Warlord right there! I also put my Warlord out to be visible... bad move as he was killed right after...


As a thank you for all the mayhem 10 Plaguebearers spawned and charged his Dread, they stood there for most of the game. Some Daemonettes spawned as well and charged my Wraithguard.


He ran to the Objective to try and get some early points, since this scenario is really mean... he also tried to support his Dread with Tacticals. Which simply meant they also ended up locked in combat for most of the game...


Horrors spawned from all the deaths! They started shooting around. There was also something that got teleported the same way as the Devastators did... but it misshaped, and in it's place Bloodletters spawned who ran up and charged the Dread (not that they could do anything against it after Furious Charge had gone off).
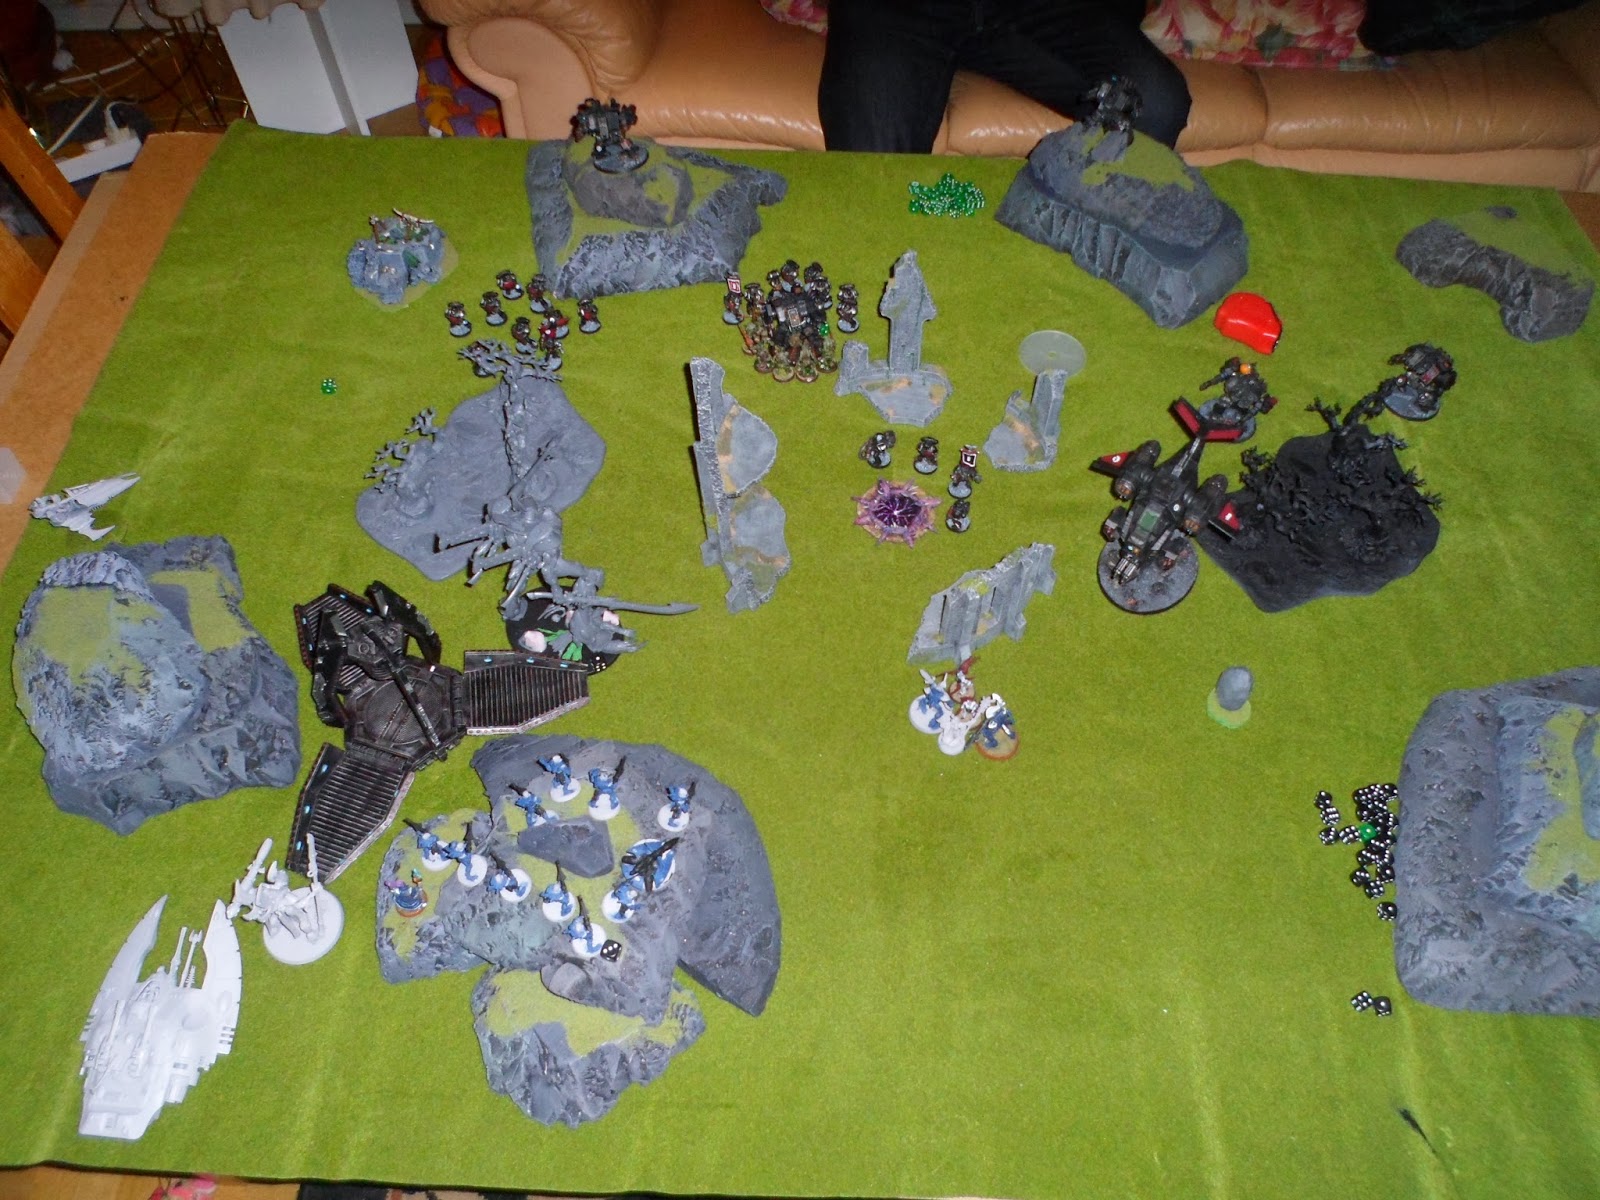

Here my opponent decided it was time to remove my invul-save and start withering down my troops... at one point I got this weird occasion that since every time you remove one of the possession tokens you have to re-roll a dice... and that meant I got to re-roll a failed armour save and stayed alive when I should've died! Weird!


Missed a turn here... but the large squad of Tacticals were first mostly killed by the Wraithknight and then teleported on to the Objective... Plaguebearrers spawned and charged in. Guardians shot (killed a lot of Tacticals) and then charged in as well. My Warlock killed his Sergeant in a challenge, meanwhile both of our squads died to Daemons... it left us with one Space Marine, a Warlock and a Guardian.


The Warlock and Guardian graciously decides to start killing Daemons sparing the Space Marine... he returns the favour by killing the last Guardian! AND THEN HE'S TELEPORTED OUT OF COMBAT. Leaving the poor Warlock to stand alone against all those Plaguebearers. What the hell!


However, the Daemon World rewarded the lone Marine by turning the forest into a Razorwing Nest which dully killed him. The rest of the battle is basically a lot of spawned Daemons who stand around to die to Dreads they can't hurt.


The Wraithknigt and Wraithguard clear out most of the Daemons around the Objective. The Dread and two surviving Marines (his only scoring unit left alive) finally kill the last Plaguebearers.


It takes all of his Shooting, but the Wraithguard are wiped out. I still have Dire Avengers in the Wave Serpent who're scoring though.


And out they come. Killing one Tactical and finishing off the last Daemons. The Dreads also finally get free out of their Daemons... so he gets some extra Shooting just when he needs it...


Which is enough to wipe out my Dire Avengers, just barely. His last Marine makes a run for it to try and claim the Objective for the last turn of the game... sadly for him I have last turn and the Wraithknight finish him off. 

I was behind all game due to First Blood... but thanks to those Dire Avengers jumping out in turn 6 and claiming the Objective I got 6 points there... turning it around and winning the game for me! Sneaky Eldar tactics!

But I really love this Scenario, it's pure madness. There's so much weird stuff happening all the time which you just can't take into account. And there's also some room for unusual tactics, as you get these Possession counters which you have to decide when to use and remove... and then there's this mechanic where for every five models that die in a turn Daemons spawn in the middle. So the turn where I dropped off my Dire Avengers my opponent had killed three models, so if I killed more than one there would spawn Daemons in the middle who'd screw my Dire Avengers over... So I had to chose targets carefully there!

But really fun game for sure!